A lesson in pickling and plumbing!
Giardiniera is what we have on the menu today. An Italian relish of sorts, it’s traditionally made using a mix of vegetables that are then preserved in vinegar or oil. Having recently been inspired to try my hand at some fermentation experiments, I’ve put a slightly lactic spin on things and gone for a fermented Giardiniera.
This simply means that instead of keeping bacteria at bay using an acid, we use salt, preserving our vegetables in a brine. This salting kills off any bacteria or mold that would cause the vegetables to spoil, whilst also giving the vegetables an acidic tang as salt resistant lactobacilus feed unimpeded on the stored veg.
Though in no way harmful, the lactobacilus bacteria do produce large quantities of CO2 during fermentation. I therefore used this experiment as an opportunity to try and build my own fermentation jar. This just meant sticking an airlock on a jar lid which lets CO2 escape whilst preventing air (more importantly Oxygen) from entering, which would lead to bacterial respiration aka rotting vegetables.
Thanks to Bon Appetite’s It’s Alive series for inspiring this video.
Click below for the full recipe with all the measurements and techniques used.
Preparing the jar
Gather your supplies.
The hardest part of the job. You could spend hours on amazon finding the right jar for you but to be honest, it’s easier to recycle. Find the biggest jar you can salvage at home (mine was a catering jar of sun-dried tomatoes from the restaurant) and start DIYing.
Otherwise you may as well buy the whole thing!
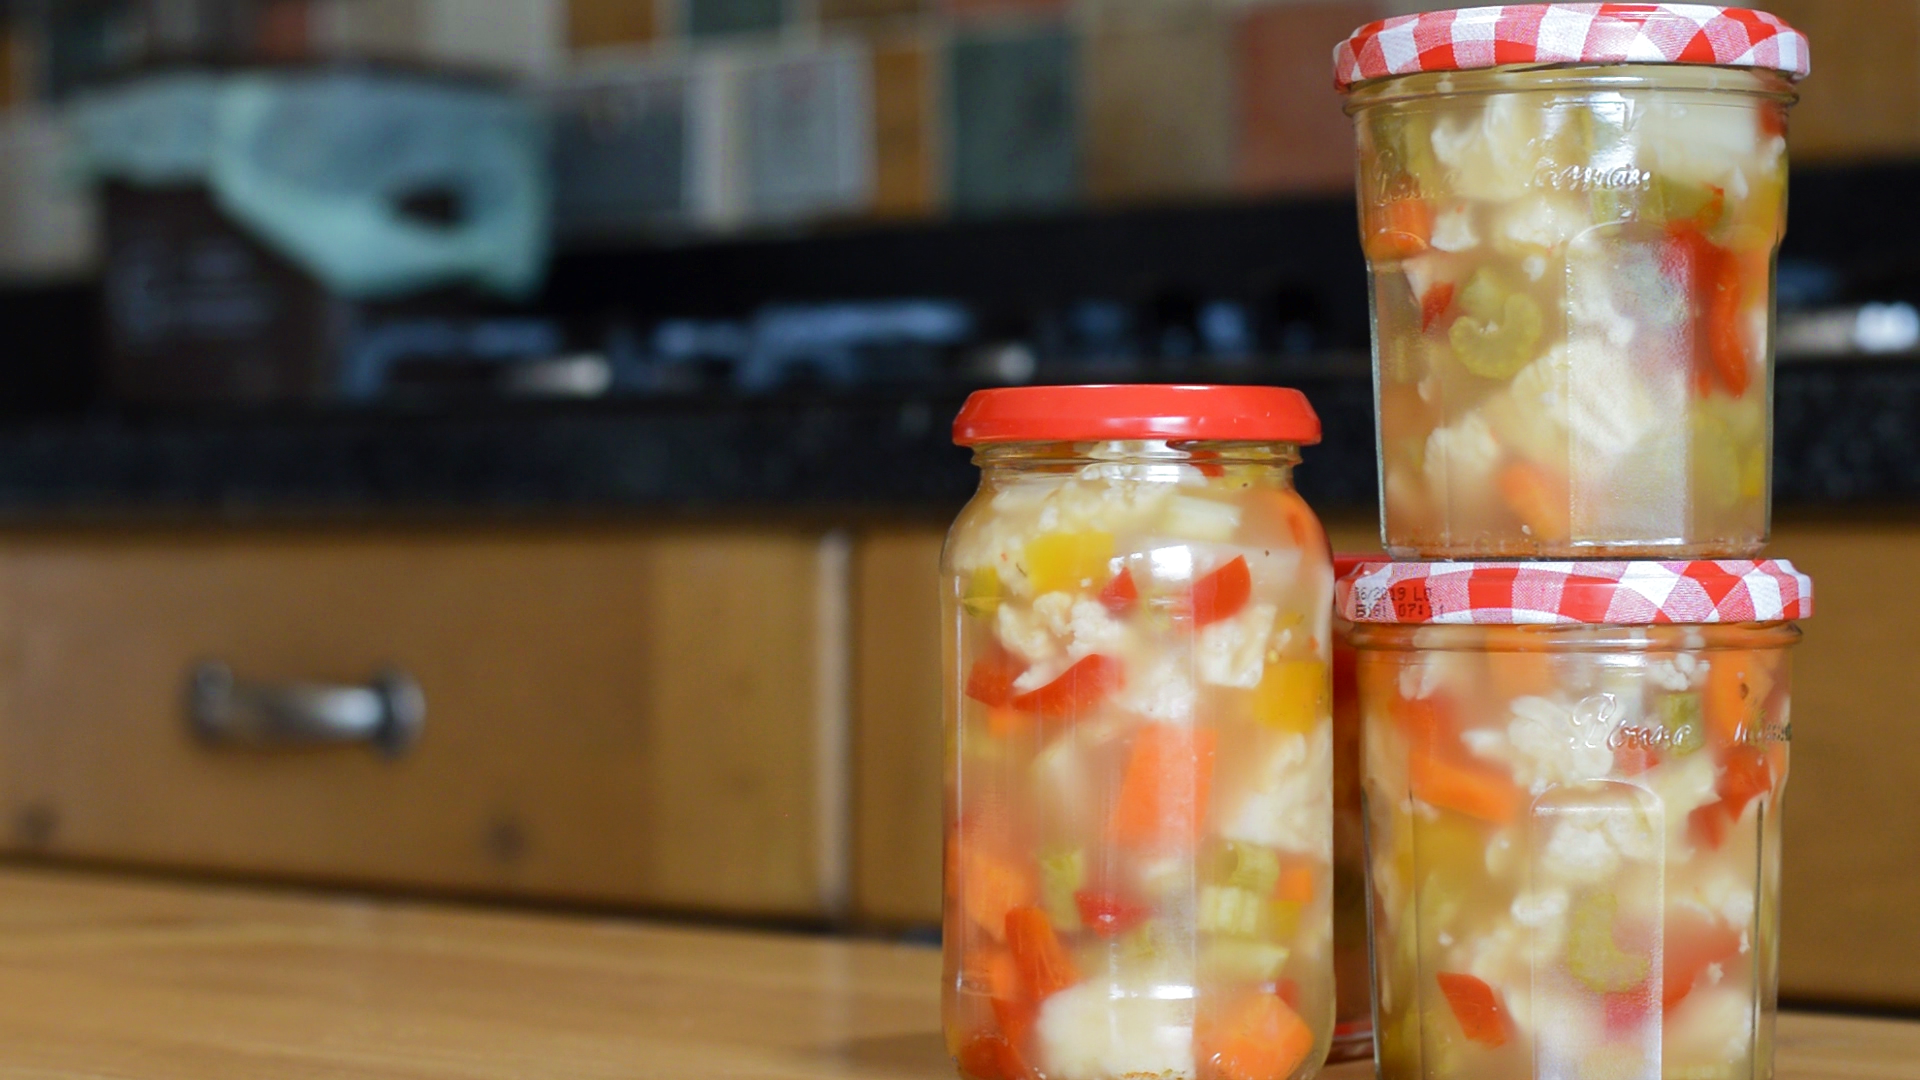
My 3l jar (with 2l of brine) produced about 6 jam jars worth of Giardiniera, for reference
Note: I’ve yet to confirm whether a metal lid is safe for fermentation. I’ll update the page if any rusting occurs on the lid.
Drill a hole that’s slightly wider than the grommet’s opening into the jar lid [0:41-1:22]
Use either a drill or Dremel for this. Drilling with a 10-12mm spade bit attachment should give the cleanest hole but as the video shows, a dremel will work just fine (and has the benefit of a sanding head that can round out any rough edges important so as not to tear the rubber grommet).

Fit the grommet into the hole [0:42-1:50]
Just pinch it into place and it should hold firm. If there’s not quite enough space, widen the hole a bit but try to keep it as snug as possible.
Careful however that you don’t cut yourself (or the grommet) on any sharp edges (this is where i advise sanding down the lid hole)
Sterilize jar and lid with hot, soapy water, rinse it clean and dry in the oven at 80°C (10 mins)
The soapy water removes any dirt or grime whilst the oven kills off any remaining bacteria and evaporate off any moisture that could lead to mold forming in the jar during fermentation.
With the jar prepped and sterilized, we can now move on to our vegetables.
Preparing the vegetables
Gather your vegetables of choice
There are no precise amounts for this recipe, it’s all a matter of which vegetables you prefer
Some of my favourite fermented veg were.
- Cauliflower
- Carrot
- Celery
- Onion
- Garlic
My not-so-favourite fermented veg:
- Peppers (too soggy)
- Green Beans (too tough)
My could-be-great, try-it-next-time vegetables:
- Cucumber
- Radish
- Chilly Peppers
Dissolve salt with the water to make a 2% salt solution, adding spices as desired. [1:55-2:25]
Specifically, a 2% salt solution, or brine, is salt water containing roughly 2% of the water’s weight in salt. For 2 liters of water (2 litres = 2000ml ~ 2000g), we therefore need 2*2000/100 = 40g of salt to make a 2% brine.
These measurements are for a 3 liter jar. For whichever sized jar your using, the brine should reach about half way up the volume of the jar.
- 2 liters water
- 40g salt
For the spices, add a 1/2 tsp per liter of brine (so 1tsp each for 2 liters of brine)
- mustard seed
- coriander seed
- fennel
- peppercorns
- cayenne
- oregano (very important for that Mediterranean vibe so double up!)
Set aside jar and cut vegetables to pickle sized chunks (or florets, if cauliflouring)
Again, the size of pickle chunking is entirely up to your preference, though I’d advise not going to fine as your veg might just dissolve into nothing!
Immerse the cut vegetables in the spiced brine and stir to disperse the spices throughout.
If you can’t fit all the cut vegetables into your jar, you can always cook down the leftover veg into a soup or stock. You’ll also need to top up the brine with some more water if the liquid doesn’t quite cover the veg completely, or pour some off if the jar’s overflowing.
- Jar of spiced brine
- Cut vegetables
Weight the vegetables down to keep them below the water line, place the lid on top and fill the airlock with water [4:15-4:41]
Your Giardiniera is now done! All that’s left now is to let it ferment, which is something only time will do.
Fermenting the vegetables
Leave your jar of Giardiniera out at room temperature to ferment for about 5 days.
You’ll know when fermentation is complete once the vegetables stop bubbling (yes it’s a very lively fermentation). This indicates that the lactobacillus bacteria have used up all the nutrients available to them, no longer producing CO2, having produced all the lactic acid they can giving you perfectly tangy, Giardiniera.
Once done fermenting, add vinegar and sugar to taste.
This gives the pickling liquid a less intense, more rounded flavour. For my 2 liters of brine, I used 100g each of granulated sugar and white wine vinegar (2.5% each by weight of liquid).
However you are free to add more or less to the brine as suits your taste (I’d actually add more vinegar next time as I enjoy the sharp edge it gives the brine)
- 100ml vinegar of choice
- 100g sugar
That’s it, all done, you can now store your Giardiniera in the fridge, or decant it into smaller, more manageable jars. Either way it should keep refrigerated for a few months, possible even years (you may need better sterilization for that)!
For more ideas of what to pair your Giardiniera with, try it in a sandwich, on salads, give our Focaccia a go and have it as a meal time appetizer, anything’s fair game…and much improved, by pickle power.